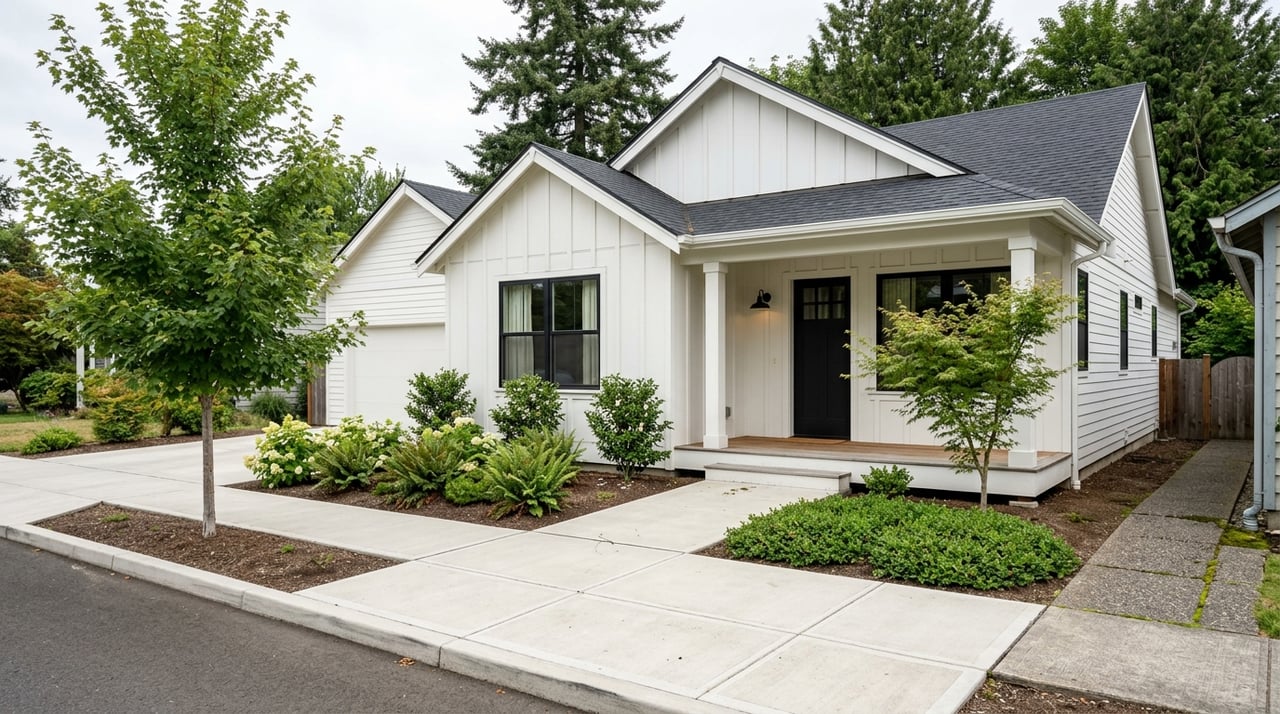
Thinking of listing your Vancouver home and wondering how to avoid last‑minute surprises? You want a smooth sale, clear expectations, and confident buyers. A pre‑listing inspection can help you get there, but it is not the right move for every seller. In this guide, you’ll learn what a pre‑listing inspection covers, when it makes sense in Clark County, the pros and cons, costs, and how to use the report to your advantage. Let’s dive in.
What a pre‑listing inspection covers
A pre‑listing inspection is a non‑invasive evaluation by a qualified inspector before you go on the market. The goal is to understand your home’s condition so you can decide whether to repair, disclose, or price accordingly.
Inspectors typically review:
- Structure: foundation, visible framing, signs of settlement or cracking.
- Roof and attic: roof covering, flashings, ventilation, insulation.
- Exterior: siding, trim, windows, doors, grading and drainage.
- Plumbing: visible supply and drain lines, water heater, fixtures.
- Electrical: service panel, visible wiring, outlets, GFCIs.
- HVAC: heating and cooling equipment, basic operation, visible ducting.
- Interior: walls, ceilings, floors, stair safety, built‑in appliances.
- Safety items: smoke/CO detectors, handrails, obvious hazards.
There are limits. Inspections are visual and non‑destructive. Inspectors do not open walls or test hidden systems. Specialized checks are separate, such as mold or radon testing, sewer scopes, wood‑destroying organism inspections, chimney evaluations, septic inspections, roof certifications, or structural engineering reviews.
Vancouver context to consider
Sellers in Washington must answer disclosure forms truthfully and disclose known material defects. A pre‑listing inspection can uncover issues you did not know about, which helps you make accurate disclosures. It supports transparency but is not a legal shield.
Local conditions matter. In the Pacific Northwest, moisture management is a big deal. Inspections often flag drainage, roof condition, and signs of water intrusion or mold. Proximity to rivers and flood zones may be relevant, and some rural or older properties use septic systems rather than municipal sewer. Earthquake risk exists in our region, and standard inspectors may note visible concerns, but seismic or structural upgrades require specialists.
Market dynamics also play a role. In a strong seller’s market with multiple offers, some sellers skip pre‑listing inspections because demand is high and buyers may waive inspections. In a balanced or buyer‑leaning market, a pre‑listing inspection can help your home stand out, reduce renegotiations, and speed closing. Ask your agent for current Vancouver and Clark County trends before deciding.
Is it right for you?
Use this quick guide to decide:
- Market: If the market is balanced or favors buyers, a pre‑listing inspection can build confidence and reduce friction. In a hot seller’s market, it may be less essential.
- Age and condition: Older homes or homes with deferred maintenance benefit from early discovery. If your home is newer and well‑maintained, you might opt to skip or limit to targeted checks.
- Sewer vs. septic: If you are on septic or in an older area with large trees, consider a septic inspection or a sewer scope.
- Timeline: If you need to sell quickly, knowing issues upfront can prevent delays during escrow.
- Budget: If you can fund key repairs before listing, an inspection helps you prioritize. If not, you can plan for credits or pricing.
- Property features: Basements or low‑ventilation areas may prompt radon testing if you are concerned. Chimneys and older roofs may warrant a specialist review.
Benefits and risks
Key benefits
- Fewer surprises: Address major defects before listing to reduce last‑minute renegotiations or buyer walkaways.
- Better pricing and disclosures: Price accurately, offer credits, or market recent repairs backed by a report.
- Stronger marketing: Sharing a current report or certifying major systems builds trust with buyers.
- Liability management: Documented conditions and transparent disclosures help reduce disputes later.
- More control: Get contractor bids on your timeline rather than rushing during escrow.
Possible downsides
- Upfront costs: Inspections and repairs can add up before you list.
- Negotiation leverage: A report can give buyers a clear list to request credits.
- Duplicate inspections: Many buyers still order their own inspection.
- Buyer perception: Big unresolved issues could reduce interest or offers.
Smart strategies sellers use
Full repair
Fix major and safety‑related items, then keep receipts and any warranties. This signals a well‑cared‑for home and reduces buyer concerns.
Price or credit
Choose not to repair and instead price for the condition or offer a repair credit. This can keep your timeline on track while giving buyers flexibility.
Disclosure‑only
Share the report and known issues, then let buyers handle repairs after closing. This approach emphasizes transparency.
Targeted repairs
Prioritize items likely to worry buyers, such as roof leaks, signs of water intrusion, electrical hazards, or structural concerns. Save cosmetic items for later.
Selective specialist checks
Order a general inspection first. Then add targeted inspections based on what is found and your property’s specifics, such as a sewer scope, wood‑destroying organism inspection, septic inspection, radon test, chimney evaluation, roof certification, or HVAC tune‑up.
Costs and timing
Costs vary by property size, age, and scope:
- General home inspection: about 300 to 700 dollars.
- Specialty inspections: sewer scope roughly 150 to 400 dollars; wood‑destroying organism inspection 75 to 250 dollars; radon 100 to 200 dollars; septic 300 to 600 dollars; roof or chimney evaluations vary.
- Repairs: small fixes may be a few hundred dollars, while roof, structural, or septic work can reach thousands to tens of thousands.
Timing tips:
- Schedule 1 to 4 weeks before listing, depending on repairs you plan.
- Expect the inspection to take 2 to 4 hours, with a report in 24 to 72 hours.
- If repairs are needed, allow time for bids, permits when required, and completion before photos and launch.
How to choose an inspector
- Licensing and credentials: Confirm any required state registration or licensing and look for membership or certifications from recognized industry groups. Also verify Washington requirements.
- Local experience: Choose someone who knows Vancouver and Clark County homes, common construction types, drainage patterns, and moisture issues.
- Sample reports: Review samples for clear photos, organization, and actionable summaries, especially if you plan to share the report.
- Insurance and references: Ask about professional liability coverage and check references or reviews.
- Clear contract: Make sure the scope, limitations, and fees are in writing.
What to do after the report
- Prioritize: Focus first on safety issues and anything related to water intrusion, roofing, electrical hazards, or structural red flags.
- Get estimates: Bring in contractors for bids. For complex items, consult specialists such as a structural engineer, roofer, septic contractor, or HVAC technician.
- Decide your approach: Repair, price/credit, disclosure‑only, or targeted fixes based on your timeline and budget.
- Document everything: Keep invoices, warranties, and any permits to share with buyers. This adds credibility and smooths negotiations.
Bottom line for Vancouver sellers
A pre‑listing inspection is a practical tool, not a mandate. It is most helpful when you want to control the timeline, reduce surprises, and present a confident, move‑in‑ready story to buyers. In a more competitive market or with older homes, it can be a real advantage. In a very hot market or for newer homes, you might opt for targeted checks instead.
If you want help deciding what makes sense for your property and the current Clark County market, connect with Joy Johnson for a clear plan and a low‑stress path to listing.
FAQs
Will a pre‑listing inspection replace a buyer’s inspection in Vancouver?
- No. Buyers often order their own inspection, but your pre‑listing inspection can reduce the number and severity of issues raised and speed negotiations.
How much does a pre‑listing inspection cost in Clark County?
- Expect about 300 to 700 dollars for a general inspection, with specialty tests such as sewer scope, radon, septic, or WDO adding to the total.
Does a pre‑listing inspection require me to make repairs in Washington?
- No. You are not obligated to repair unless required by code or agreed in the contract, but you must disclose known material defects truthfully.
Should I share my pre‑listing inspection report with buyers?
- Many sellers share the full report or a summary to build trust and save time. Ask your agent about timing and whether to redact personal details.
Which extra inspections matter most for Vancouver homes?
- Start with a general inspection, then consider a sewer scope for older areas or heavy tree roots, WDO if there is evidence or older wood construction, septic if applicable, and radon if concerned.
How long do the inspection and report take before listing?
- The inspection usually takes 2 to 4 hours, and most inspectors deliver the report within 24 to 72 hours.